
Video Conferencing for Advanced Users
3CX includes some truly collaborative features in the 3CX Meet function. Our advanced web conferencing features are ideal for webinars, online presentations, screen-sharing and more. This guide will take you through 3CX’s advanced web conferencing features and how to use them. To learn how to create an ad hoc web meeting or a simple video conference, read our video conferencing guide.
Collaboration Tools
Whiteboard
An online whiteboard is the virtual form of the traditional classroom blackboard - a virtual canvas. It helps visualize ideas and brainstorm without the need to physically be in the office. 3CX Video Conferencing has 3 templates to choose from.

During a meeting, click the “Share Content” button (shown above) in the bottom right corner.
- You will be given the choice to choose either a blank, dotted, or Chalk Board template.
- Once you choose your template, a toolbar will appear at the bottom of your screen with various options: text, draw, fill and so on.
- To stop sharing the whiteboard press the “Stop Sharing Content”
button.
Share PDF
Click the “Share Content” button and then press the in the bottom right corner to upload and share PDFs while in a meeting:
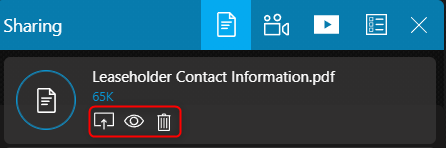
- Once you upload a PDF it will be shown in your 3CX Screen Sharing options.
- From there you can choose to share them with other meeting participants, view them in a separate tab or delete them.
- Click the share
button to share the PDF with the participants.
- Once shared, a toolbar will appear at the bottom of your screen with various options: text, draw, fill and so on.
- The participants can ask questions related to the document by clicking the
“Raise your hand” button.
- To stop sharing the document, press the “Stop Sharing Content” button.
Screen Sharing
The “Screen Sharing” feature is used as a collaboration and presentation tool allowing you to present your screen to other participants.

- Click on the “Present your screen” button in the bottom menu.
- Choose whether you want to share a “Chrome Tab”, a “Window”or your “Entire Screen”.
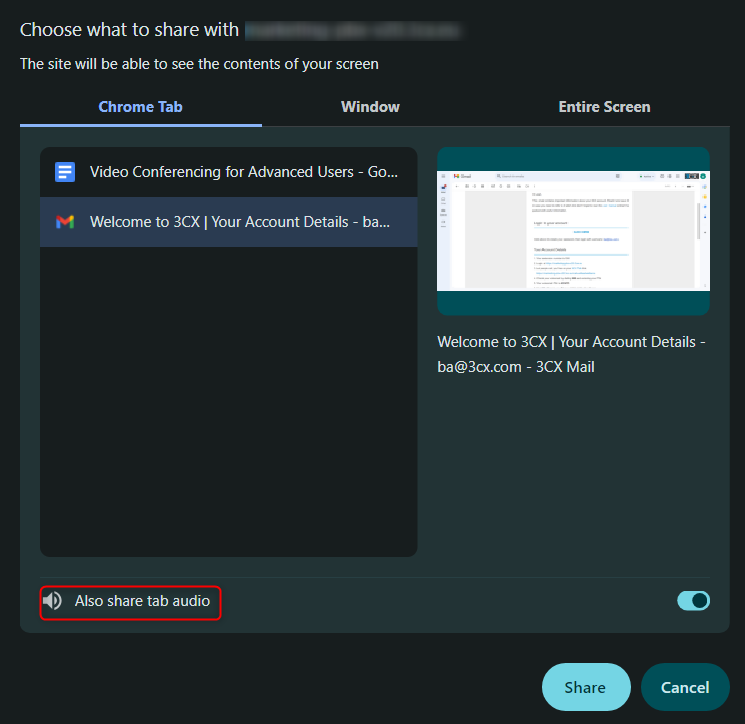
- If you choose to share a Chrome Tab you will have the option to “Also share tab audio”. Click the toggle bar accordingly.
- Press “Share”.
- To stop screen sharing, click on the “Stop presenting” button.
Chat Features
The chat feature is accessible from the bottom right corner .
Share Files

- Organizers and presenters can share files up to 32MB size each, by:
- Drag-and-drop in the chat panel.
- Clicking the “File upload” icon and selecting the file(s) to share.
- All participants can open and save shared files.
Chat Q&A
From the chat panel, you can create polls and participate in a Q&A by clicking the “Questions” button.
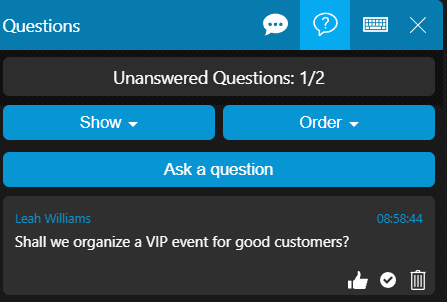
- From the “Show” dropdown you can see your “Answered”, “Unanswered” and “All” questions.
- The “Order” dropdown allows you to sort questions by “Oldest”, “Newest” and “Popular”.
- Add your own questions by clicking the “Ask a Question” button.
- Block participants from asking a question by clicking the “Disable and lock the questions of the audience”
button in the chat bar.
Get Feedback
Create Polls

Organizers can actively engage with their audience and get their feedback by creating polls.
- Click on the “Share Content” button to bring up the Presentation options.
- Select to “Start a new poll”
. Here you will see a list of previously created polls and the options to share, edit or delete them.
- Create a new poll by clicking on the
in the bottom right corner.
- Now add the questions and their answer choices.
- Click on “Save” to store the new poll.
- Your poll will now be saved in your poll repository.

- Create report - creates a pdf report of the poll in a new tab. Participants are able to download a PDF file with the poll results from the “Open Report” button.
- Share results - share poll results with participants. By default participants’ names and their answers are shared.
- Anonymous - allows the organizer to create an anonymous poll report. The answers are included, however, the names of the participants are not.
- To remove the poll from the participants’ screens and resume the meeting press the “Stop Sharing Content”
button at the bottom.
Broadcast on YouTube
Go live on YouTube and broadcast your web meeting to your customers and followers.
- Login to YouTube and from the top right click on “Create” > “Go Live”.
- Click on “Schedule Stream”.
- Enter your Live Stream Details: Title, Description, Age restrictions and so on.
- Choose your customization settings, i.e. who can send messages and reactions.
- Choose your Live Stream visibility, public, private or unlisted and then schedule your live stream.
- Click “Done”.
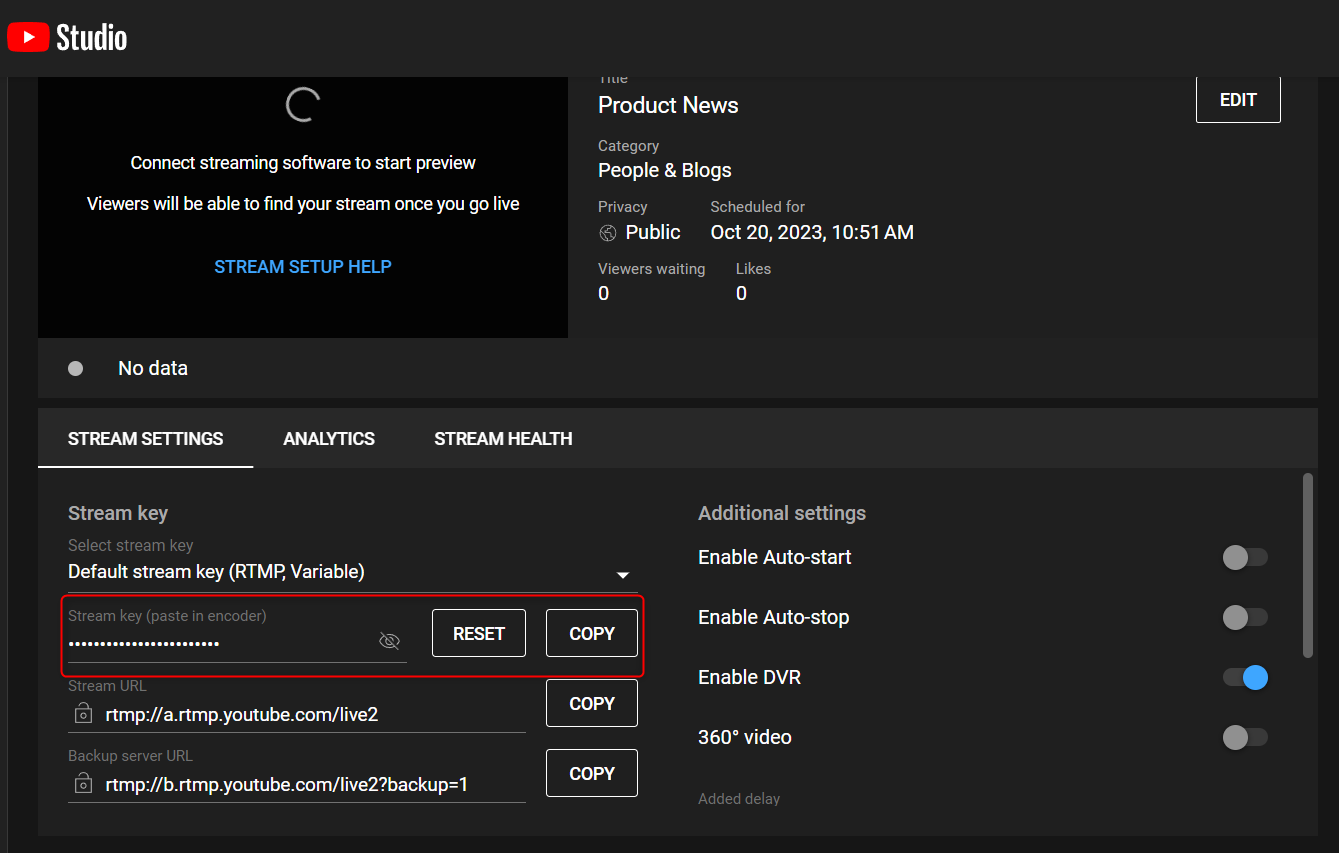
- From this screen you need to copy the stream key - as shown above.
- Go to 3CX Meet and click on the “Share Content” button.

- Select “Share video stream”, shown above. Enter the YouTube Stream Key you copied from YouTube.
- Click on the
button and the “Ready” status will change to “On Air”.
- Go back to YouTube and click on the “Go Live” button in the top right corner.

- You are now Live Streaming!
- To pause your stream click on the coffee cup icon in 3CX
. This mutes and disables all participants' audio/video devices and a banner will be shown on Youtube until you are ready to resume.
- To end your live stream click on the “End Stream” button in the top right corner in YouTube. Alternatively, streaming will automatically stop once you end the meeting in 3CX.
Notes:
- To start your first live stream you may need to verify your channel. Go to “Create” > “Go Live” and follow the prompts on YouTube to do so. Enabling your first live stream may take up to 24 hours. More information here.
- Depending on your location there may be a 20 second delay for video transmission.
- Chats of participants on YouTube cannot be seen or answered in 3CX.
In meeting video playback with YouTube
Existing YouTube content can be played during a video conference. The presenter remains in control of video controls such as play/pause and timeline skipping.
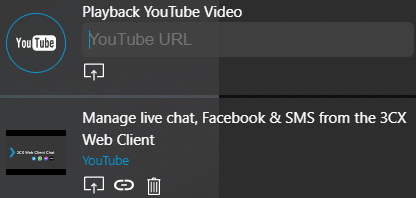
- Open Youtube and copy the video URL from the share icon.
- Go to 3CX Meet. Navigate to “Share Content” > “Share Video Stream”.
- In the “Playback YouTube Video” field, enter the copied URL and press “Share”.
Note:
- Videos need to be publicly available as every participant will load the video directly.
- YouTube Ads cannot be removed.
- All uploaded YouTube videos are accessible to the host throughout the meeting and can be presented, shared or deleted at any time.
Meeting Rooms
3CX supports two types of virtual meeting rooms, as set by your system administrator:
- Private - For one-on-one meetings, ideal for support and customer service inquiries. Your extension’s 3CX Meet URL can be used as a Private room, enabling anyone to join from their browser. The system sends a notification e-mail or chat to the assigned extension when the link is clicked and a meeting is requested.
- Shared - If the option “Requires you to connect to the meeting first” is enabled by your PBX Administrator, you can organize group meetings. Participants can join the meeting via the 3CX Meet link:
- Directly if the organizer has already joined.
- After the organizer’s approval if the “Approve Participants” option is set by the PBX administrator for your extension to moderate participants.
Notes:
- If the “Approve Participants” option is set, kicking a participant out of a meeting allows the organizer to stop them from rejoining.
- You can “Lock the Meeting” to prevent participants logging in once the meeting has started.
Settings
To edit your settings, click on the “Options” button (the gear icon) on the bottom right of your 3CX Meet screen.
- Device:
- Webcam
- Microphone
- Speakers
- Meeting Quality:
- Choose between “Stability”, “Balanced” and “Quality” to automatically adjust the video, for a more stable meeting experience.
- Background Blurring.
- Full HD resolution in Quality Mode (High CPU usage).
- Auto Gain Control - increases or decreases your mic’s input and output automatically.
- Echo cancellation - removes echo caused by the mic picking up the speaker's output.
- Noise suppression - filters out very specific noises like keyboard typing.
- Notifications:
- Enable or disable the sounds on join and chat.
- Force sound on join, even if the web client is in foreground.
- Force sound on chat, even if the web client is in foreground.

- Switch to the “Statistics” tab as shown above to see:
- Connection data.
- Technical info in regards to uplink stats,video loss, resolution, platform info and system connections.
- The “Statistics” section includes helpful graphs for troubleshooting connectivity issues.